ACF For Dokan
This is the help document for the ACF For Dokan PRO plugin. We recommend going through this plugin manual before installing and using the plugin.
If you have gone through the manual and still have any questions, feel free to contact us at krazyplugins@gmail.com.
Introduction
Admin can easily create custom fields for vendors while he is creating or editing products, managing orders. Admin can also get additional information from vendor from vendor registration form. While creating a custom field using Advance Custom Field, admin needs to select ‘Vendor Edits Allowed’ so that vendor can use that custom field.
How to use the plugin?
Manage ACF Fields for Add/Edit product form
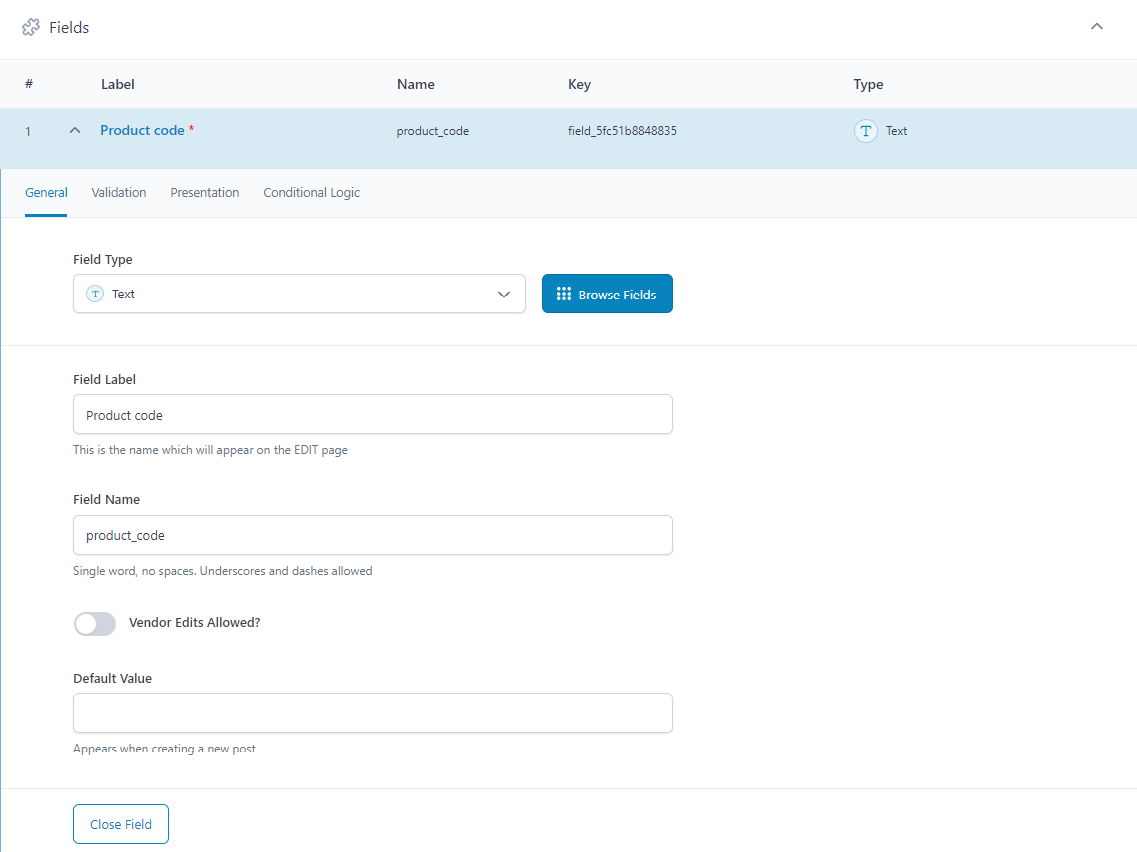
Once you have installed the plugin, you can go to Custom Fields page where you are creating custom fields. You will see one new option called Vendor Edits Allowed? You need to turn it on to allow that custom field to be managed by Vendor from the vendor dashboard.
You can see that custom field in the add new product form. The add new product form will work with the custom fields like text, textarea, phone, email, URL and select. The reason is the way Add new Product form is built, it does not allow custom fields like image, taxonomy, relationship field types.
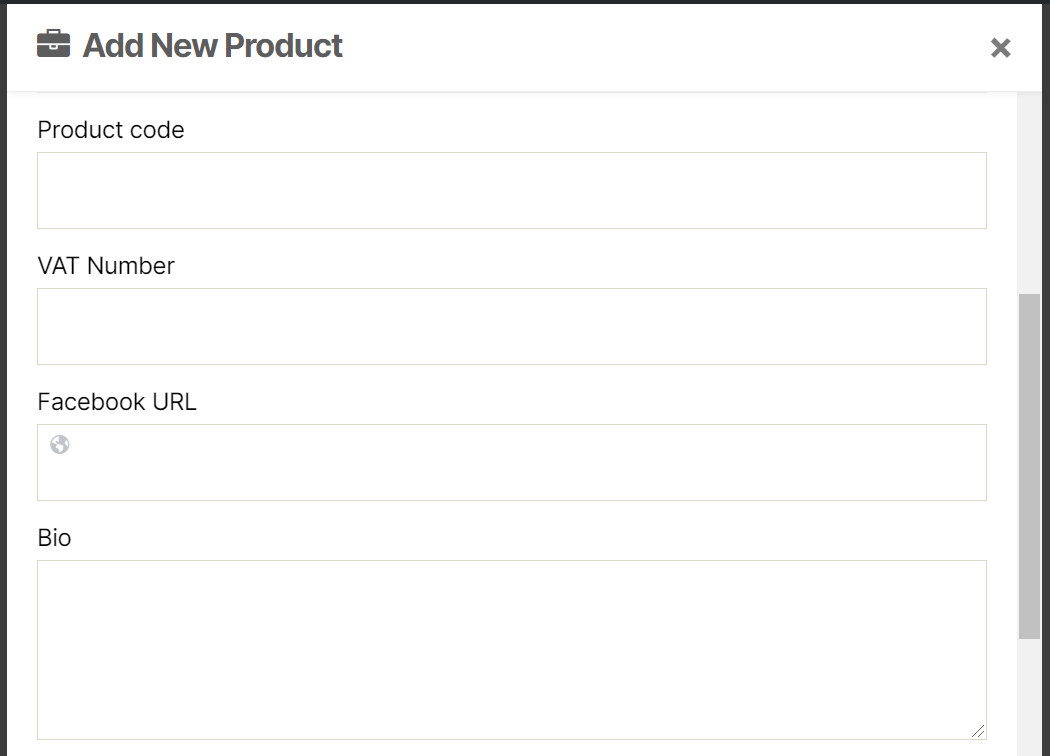
Other ACF field types like repeater, gallery, relationship, taxonomy, google map will work in the edit product form.
You can refer this blog to display field values.
Manage ACF Fields for Vendor registration form
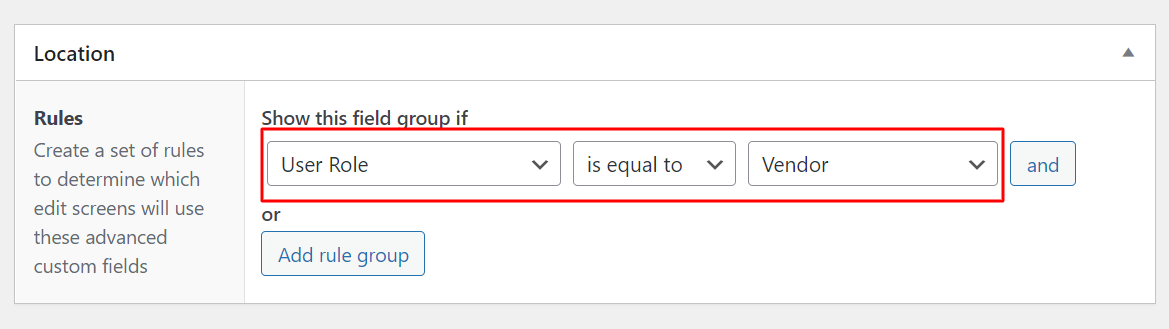
Admins can easily create custom fields for vendors in the vendor registration form. While creating a custom field using Advance Custom Field, the admin needs to select ‘Vendor Edits Allowed’ so that field is visible in the registration form.

The admin needs to select User Role equal to Vendor in the custom field location rules to make this setting work. After vendor login, they can update the custom fields from the edit account page. The supported field types of ACF are text, textarea, number, URL, select, email, checkbox, radio, file.
Now, the field is created for a vendor. You can use the below ACF functions to display the value:
the_field ( ‘field_name’,  ‘user_1’ );  // where 1 indicates user ID
echo get_field ( ‘field_name’,  ‘user_1’ ); // where 1 indicates user ID
You can refer this blog to display the custom field value of the user.
Manage ACF Fields for Order
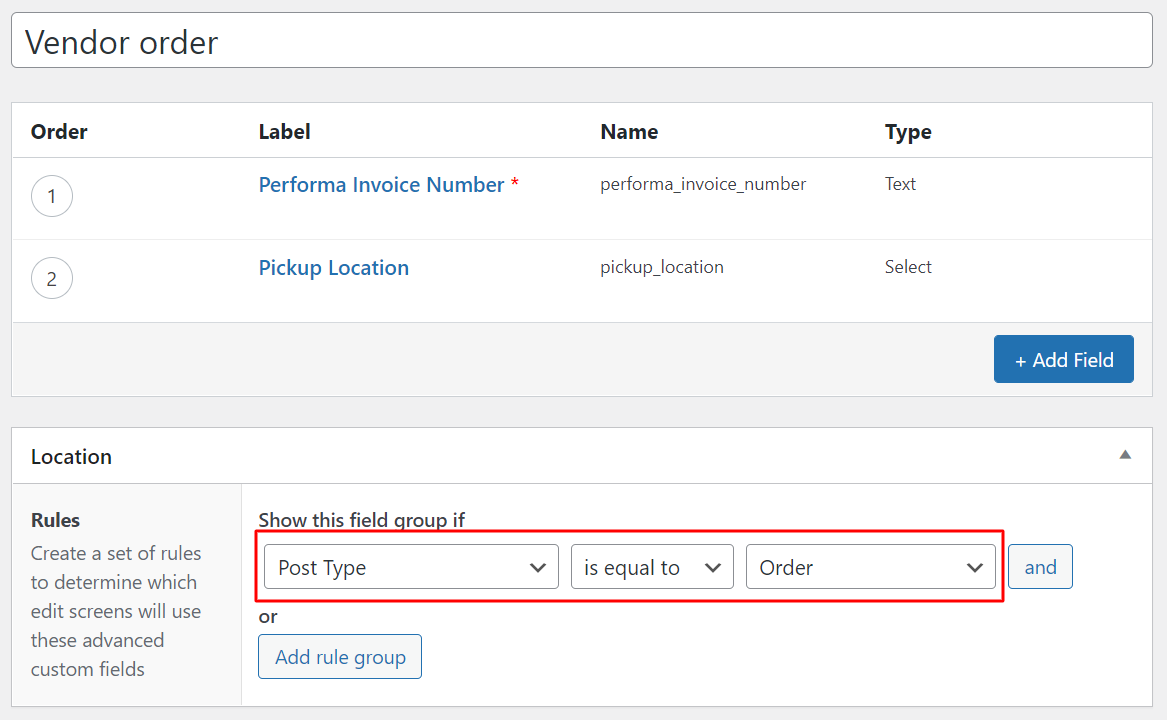
When the admin creates custom fields from the ACF plugin for the Order post type, the Vendor will be also able to add/update values for orders from their dashboard. The process is same, turn on the Vendor Edits Allowed? option in the field. Also, apply the rule to Post type is equal to Order.
You can use ACF functions like the_field, get_field to display the custom field value of the vendor.
You can refer this blog to display field values.
ACF Fields in Vendor Setup Wizard
Now, you can setup the custom field editable with the Dokan Setup Wizard. There will be a new setting field called Allowed in Setup Wizard? if you enable Vendor Edits Allowed.
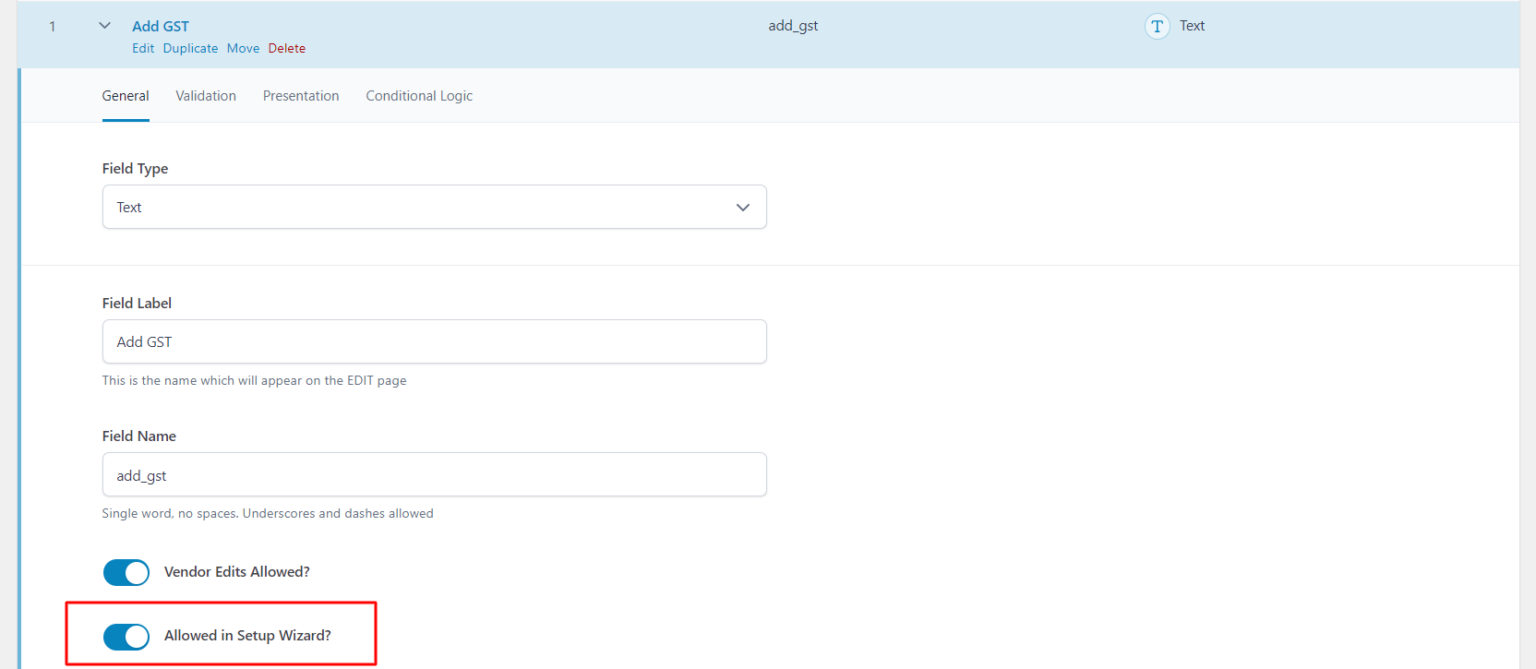
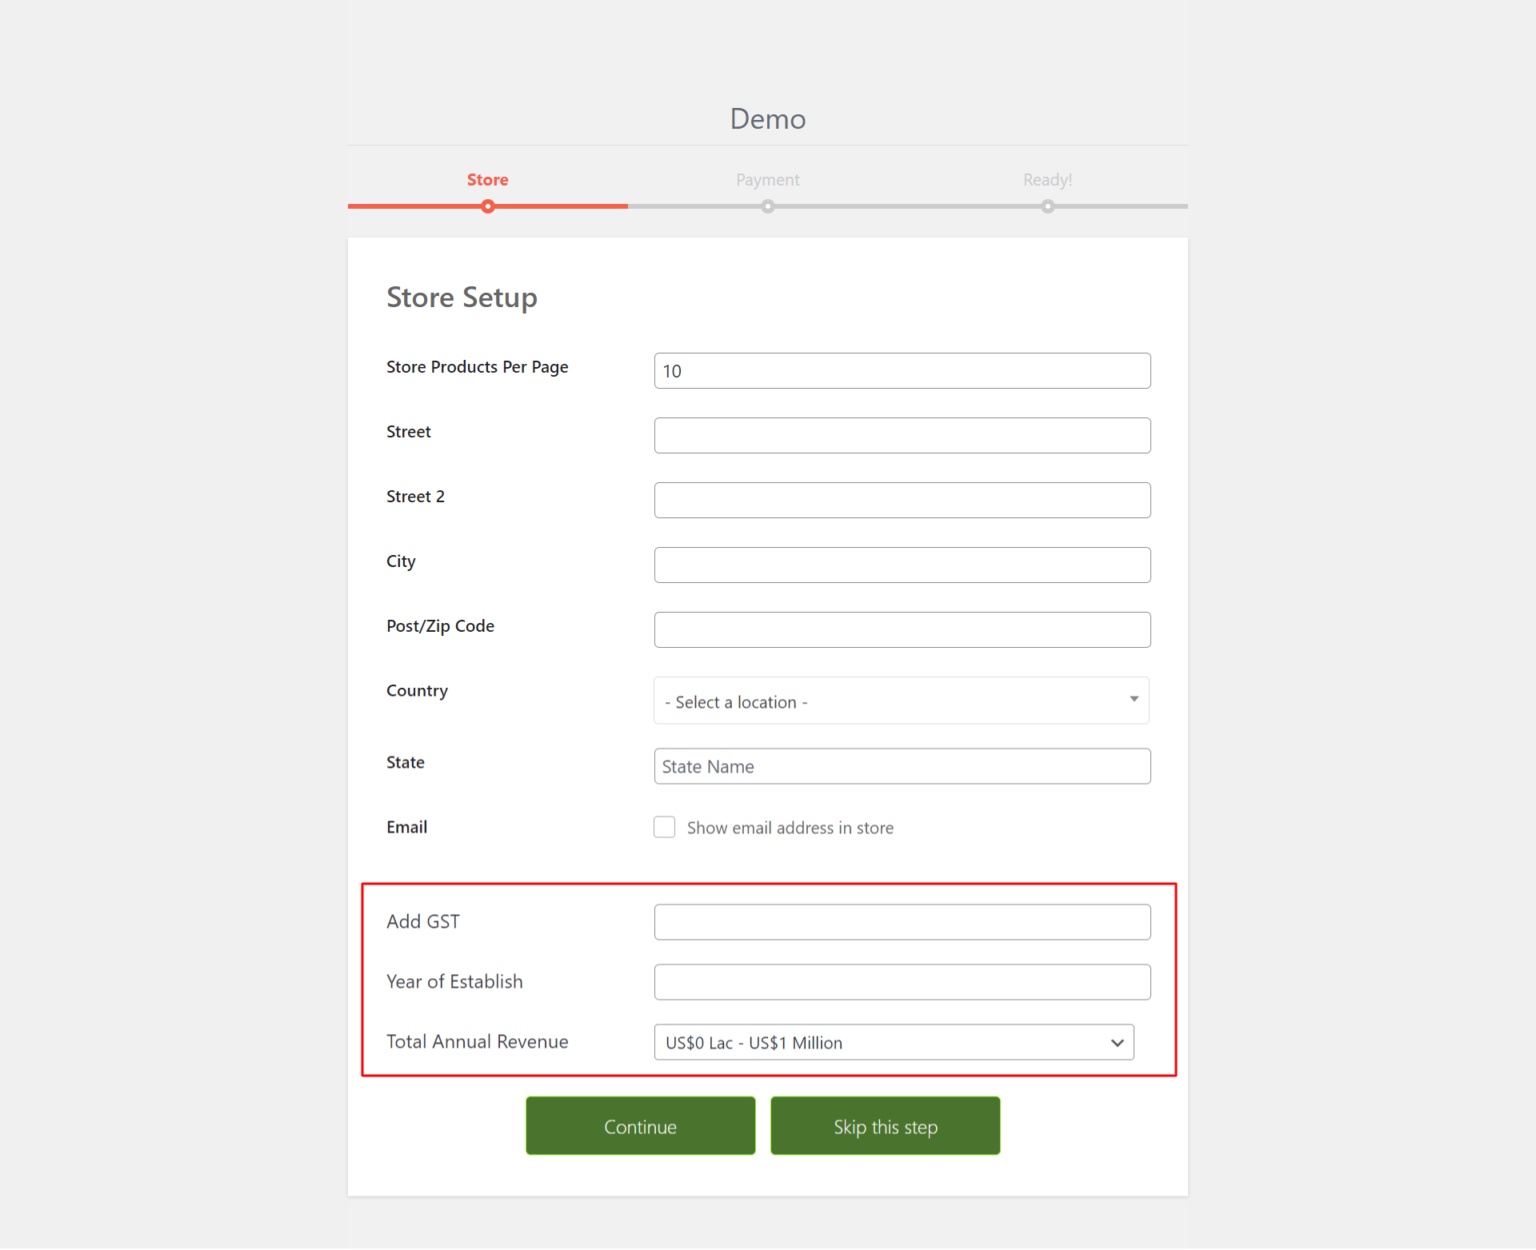
If the field Allowed in Setup Wizard is enabled, the vendor will see the custom field in the setup wizard.
As an admin if you wish to view the custom field of that vendor, you can do it from Users->Edit user
FAQs
1. How to hide/show custom fields based on the category selection?
You can add the below code in the js file which is called on the front side of theme or you can use the WordPress hook to add the below js to every page.
<?php function kp_hook_javascript_footer() { ?>
<script>
  jQuery( ".acf-fields.acf-form-fields .acf-field" ).hide();
    sel_cat = jQuery(".dokan_chosen_product_cat").val();
    if( sel_cat != "" ) {
      dokan_cat_sel(jQuery(".dokan_chosen_product_cat").val());
    }
    jQuery(document).on('opened', '#dokan-add-product-popup', function (e) {
      jQuery( ".acf-fields.acf-form-fields .acf-field" ).hide();
    });
    wp.hooks.addAction( 'dokan_selected_multistep_category', 'dokan-multistep-category', function ( selected_cat ) {
      //console.log('selected category = '+ selected_cat );
      dokan_cat_sel(selected_cat);
    });
    function dokan_cat_sel ( selected_cat ) {
      if( selected_cat == "111" ) { // 111 is the category id of Clothes
        jQuery( ".acf-fields.acf-form-fields .acf-field" ).hide();
        jQuery( ".acf-field_643d6e0183608" ).show(); // ACF field key you wish to show if Clothes category is selected
      } else if( selected_cat == "144" ) { // 144 is the category id of shoes
        jQuery( ".acf-fields.acf-form-fields .acf-field" ).hide();
        jQuery( ".acf-field-643e1f19259b3" ).show(); // ACF field key you wish to show if shoes category is selected
        jQuery( ".acf-field-643a195736af0" ).show(); // ACF field key you wish to show if shoes category is selected
      } else{
        jQuery( ".acf-fields.acf-form-fields .acf-field" ).hide();
      }
  }
</script>
<?php }
add_action('wp_footer', 'kp_hook_javascript_footer');
2. How to remove custom fields from the edit account page?
You can add the below code in theme's function file.
global $acf_for_dokan_pro;
remove_action( 'woocommerce_edit_account_form', array( $acf_for_dokan_pro, 'acf_dokan_pro_edit_vendor_account' ), 10 );
Features
-
Supported fields for add/edit product form: Text, textarea, number, url, select, checkbox, radio, file, email, WYSIWYG editor, Gallery, Repeater, Taxonomy, Google map
-
Multiple ACF Field groups are supported
-
Ajax search for select field for add/edit product form
-
Dokan Bookings – bookable products
-
Fields for vendor registration form & edit account page from vendor’s login
-
Fields for vendor edit order
-
Fields for vendor setup wizard
